Engineering Skillsbeginnerfundamentals
Top 10 Final Year Engineering Project Ideas with Arduino & ESP32 (2026)
Ten final year project ideas for ECE, EEE and CSE students using Arduino and ESP32, plus an evaluation template, viva tips and a documentation checklist.
By ADIY13 min read
Technical review pending. Figures marked “verify” or “check your part” have not been confirmed against your exact hardware revision. Check the manufacturer datasheet before relying on them in a design.
1. Introduction — Why Your Project Choice Matters#
For final year engineering students—whether in ECE, EEE, or CSE—the major project is more than just an academic requirement. It is the bridge between theoretical knowledge and real-world application. A strong, innovative project can make your resume stand out to recruiters, serve as a talking point in technical interviews, and lay the foundation for startup ideas.
In 2026, the focus of the tech industry in India is heavily skewed towards Internet of Things (IoT), Automation, Smart City solutions, and Robotics. Leveraging robust microcontrollers like the ADIY UNO R3 and wireless modules like the ESP32 allows you to build industrial-grade prototypes on a student budget. This guide breaks down the top 10 most relevant, impactful, and score-boosting final year engineering project ideas for the 2026 academic year.
2. How to Pick the Right Project#
Choosing a project can be overwhelming. Here is a framework to help you decide:
- Novelty & Innovation: Does this project solve a real problem in a unique way? (e.g., instead of just a line follower, make a warehouse sorting robot).
- Feasibility & Component Availability: Can you easily source the parts? (Using "Make in India" ADIY components ensures fast shipping across India).
- Faculty Approval: Does it meet your university’s syllabus guidelines? Ensure it has enough technical depth (e.g., PID control, API integration, or PCB design).
- Cost Effectiveness: Can you build it within your team's budget?
3. Project Evaluation Template#
Use this evaluation matrix to score your project ideas before pitching them to your internal guide.
| Criteria | Low Value (1-2) | Medium Value (3-4) | High Value (5) |
|---|---|---|---|
| Complexity | Basic plug-and-play code | Custom logic and moderate wiring | Advanced algorithms (PID, ML), custom APIs |
| Cost (₹) | > ₹5000 (Expensive) | ₹2000 - ₹5000 | < ₹2000 (Highly Budget-friendly) |
| Innovation | Standard textbook project | Modified standard project | Solves a specific local/industrial problem |
| Learning Value | Basic coding | Interfacing multiple protocols (I2C, SPI) | Full-stack IoT implementation (Hardware + Cloud) |
The Top 10 Projects for 2026#
1. Smart Dustbin with Ultrasonic Sensor & Servo (Beginner)#
Description: An automated, touchless dustbin that opens its lid when a hand is detected and monitors its fill level, sending an alert when full.
Approx Cost: ₹800 - ₹1200
Core Components:
- ADIY UNO R3
- HC-SR04 Ultrasonic Sensor (x2)
- Servo Motor (SG90 or MG995)
- Jumper Wires & Power Supply
How it Works:
The primary HC-SR04 sensor is mounted on the front of the dustbin. The ADIY UNO R3 continuously pings the sensor. When an object (like a hand or garbage) comes within a 15-20 cm range, the Arduino triggers the Servo Motor to rotate 90 degrees, pulling open the lid. After a 5-second delay, the lid closes automatically.
A secondary ultrasonic sensor is mounted inside the lid pointing downwards to measure the distance to the garbage level. By calculating the difference between the total height and the measured distance, the system calculates the fill percentage.
Key features to add for extra marks: Add an ESP8266 to send an email alert or a Telegram message to the municipal worker when the bin is 90% full.
2. IoT-Based Home Energy Monitor (Intermediate)#
Description: A real-time electricity consumption monitor that logs data to a ThingSpeak dashboard.
Approx Cost: ₹1500 - ₹2500
Core Components:
- ESP32 Development Board
- ACS712 Current Sensor (20A/30A)
- ZMPT101B Voltage Sensor
- 16x2 I2C LCD Display
How it Works:
This project involves measuring the AC mains current and voltage in real-time. The ACS712 sensor uses the Hall Effect to measure the current flowing through a live wire, outputting an analog voltage proportional to the current. The ESP32’s ADC reads this value, calculates the RMS current, and multiplies it by the RMS voltage (from the ZMPT101B) to get the real power (Watts).
Because the ESP32 has built-in Wi-Fi, it pushes these readings to an IoT platform like ThingSpeak or Blynk every minute. Users can log in to view graphs of their power consumption, estimate their monthly bill, and identify power-hungry appliances.
Key features to add for extra marks: Add a Relay Board to automatically cut off power if the current exceeds a safe threshold (acting as a smart circuit breaker).
3. Gesture-Controlled Robot (Intermediate)#
Description: A wireless robotic car controlled by hand movements using an accelerometer mounted on a glove.
Approx Cost: ₹2000 - ₹2500
Core Components:
- ADIY UNO R3 (x2 - Transmitter and Receiver)
- ADXL345 Accelerometer
- NRF24L01 Transceiver Modules
- L298N Motor Driver
- BO Motors and Chassis
How it Works:
The transmitter circuit consists of an ADIY UNO, an ADXL345 accelerometer (attached to a glove), and an NRF24L01 module. As the user tilts their hand, the accelerometer detects changes in the X and Y axes. These analog/I2C values are mapped to directional commands (Forward, Backward, Left, Right, Stop) and transmitted wirelessly.
On the receiving end, the robot chassis carries the second Arduino and the L298N motor driver. The receiver decodes the radio signals and applies the corresponding logic levels to the L298N input pins, driving the DC motors accordingly.
Suggested extensions: Implement a robotic arm on top of the car, controlled by flex sensors on the glove fingers.
4. Smart Agriculture System (Beginner / Intermediate)#
Description: An automated irrigation system that monitors soil moisture, temperature, and humidity, and waters crops automatically.
Approx Cost: ₹1200 - ₹1800
Core Components:
- NodeMCU ESP8266 or ADIY FLY Pico W
- Capacitive Soil Moisture Sensor
- DHT11 Temperature & Humidity Sensor
- 1-Channel Relay Module
- 5V Water Pump
How it Works:
The soil moisture sensor provides analog voltage readings representing the water content in the soil. Unlike cheap resistive sensors, a capacitive sensor prevents corrosion, ensuring longevity in real soil environments. The DHT11 monitors ambient conditions.
When the soil moisture drops below a predefined threshold (e.g., 30%), the microcontroller activates the relay. The relay acts as a switch to turn on the water pump. Once the moisture reaches 70%, the pump turns off. All this data is mirrored to the Blynk app via Wi-Fi.
5. Health Parameter Monitor (Intermediate)#
Description: A wearable prototype that monitors heart rate and body temperature and displays it on an OLED screen.
Approx Cost: ₹1000 - ₹1500
Core Components:
- ADIY UNO R3
- Pulse Sensor (Analog)
- LM35 Temperature Sensor
- 0.96" OLED Display (I2C)
How it Works:
The Pulse Sensor acts as a simple optical heart rate sensor combined with amplification and noise cancellation circuitry. When clipped to a fingertip, it measures the change in light absorption caused by blood pulsing through capillaries. The Arduino calculates the Beats Per Minute (BPM) based on the time interval between pulses.
Simultaneously, the LM35 outputs an analog voltage linearly proportional to Celsius temperature (10mV/°C). The ADIY UNO processes these inputs and formats the text to display clearly on the I2C OLED screen using the Adafruit SSD1306 library.
6. Voice-Controlled Home Automation (Intermediate)#
Description: Control home appliances via voice commands using Google Assistant or Amazon Alexa.
Approx Cost: ₹1500 - ₹2500
Core Components:
- ESP32 or NodeMCU ESP8266
- 4-Channel Relay Board
- Jumper Wires & Power Supply
How it Works:
The ESP32 connects to the local Wi-Fi and connects to an MQTT broker (like Adafruit IO) or uses webhooks via IFTTT (If This Then That). When the user says, "Ok Google, turn on the bedroom light," Google Assistant sends a trigger to IFTTT.
IFTTT then sends an HTTP POST request to the ESP32 or updates the MQTT feed. The ESP32 parses this command and triggers the appropriate GPIO pin connected to the relay board, which safely switches the 220V AC appliance on or off.
7. Automatic Street Light Controller (Beginner)#
Description: An energy-saving street light system that turns on based on ambient light and time schedules.
Approx Cost: ₹800 - ₹1200
Core Components:
- ADIY UNO R3
- LDR (Light Dependent Resistor) Module
- DS3231 RTC (Real Time Clock) Module
- Relay Module & LED Strips
How it Works:
Standard street lights often stay on during early mornings or when there's sufficient daylight, wasting energy. This system uses an LDR in a voltage divider circuit to detect ambient light. The Arduino reads the LDR value; if it's dark, it switches on the relays.
By integrating a DS3231 RTC, the system becomes smarter. For example, the lights can run at 100% brightness from 6 PM to 12 AM, and then drop to 50% brightness (using PWM and MOSFETs instead of relays) from 12 AM to 5 AM to save maximum power.
8. Air Quality Monitoring Station (Intermediate)#
Description: An environmental monitoring tool that detects harmful gases and particulate matter, uploading data to the cloud.
Approx Cost: ₹2000 - ₹3500
Core Components:
- ESP32
- MQ135 Gas Sensor (Air Quality / CO2 / Ammonia)
- MQ2 Gas Sensor (Smoke / Combustible Gases)
- DHT22 (Precision Temp/Humidity)
- Optional: PMS5003 Dust Sensor
How it Works:
The MQ series sensors contain a small heater inside that changes the resistance of the sensor material when exposed to target gases. The ESP32 reads the analog voltages and maps them to Parts Per Million (PPM) using calibration curves. The DHT22 gathers accurate climate data.
This data is aggregated and sent via Wi-Fi to a cloud database (like Firebase or AWS IoT). A simple web app or mobile app can then display the Air Quality Index (AQI) in real-time, warning users if the environment becomes hazardous.
9. RFID-Based Attendance System (Intermediate)#
Description: An automated attendance logger that reads student ID cards and logs entry times onto an SD card or Google Sheets.
Approx Cost: ₹1200 - ₹2000
Core Components:
- ADIY UNO R3
- MFRC522 RFID Reader Module
- RFID Tags/Cards
- Micro SD Card Module
- DS3231 RTC Module
How it Works:
The MFRC522 operates at 13.56 MHz and communicates with the Arduino via the SPI protocol. When an RFID tag is tapped, the module reads its unique UID. The Arduino checks this UID against a hardcoded list of authorized users.
If authorized, the Arduino retrieves the current timestamp from the RTC module and appends a record (e.g., "UID: 12345, Name: Rahul, Time: 09:05 AM") into a CSV file on the SD card. This file can be later imported directly into Excel.
10. Line-Following Robot with PID Control (Advanced)#
Description: A high-speed line follower that uses Proportional-Integral-Derivative (PID) algorithms for smooth, jitter-free navigation.
Approx Cost: ₹2500 - ₹3500
Core Components:
- ADIY UNO R3
- 8-Channel IR Sensor Array (QTR-8RC or custom)
- L298N or TB6612FNG Motor Driver
- High RPM DC Motors
How it Works:
A standard line follower uses basic IF-ELSE logic ("if left sensor sees black, turn left"), which results in a wobbly, zig-zag motion. A PID controller drastically improves this. The IR array calculates the exact "error" (how far the center of the robot is from the line).
The PID formula calculates an adjustment speed based on the current error (Proportional), the accumulation of past errors (Integral), and the rate of change of the error (Derivative). This adjustment is applied to the PWM signals of the motors, allowing the robot to take corners smoothly at high speeds.
Arduino PID Code Snippet Example:#
int P, I, D, previousError = 0;
float Kp = 1.5, Ki = 0.01, Kd = 2.0;
void calculatePID() {
  P = error;
  I = I + error;
  D = error - previousError;

  int PID_value = (Kp * P) + (Ki * I) + (Kd * D);
  previousError = error;

  // Apply PID_value to motor PWM speeds
  int leftMotorSpeed = baseSpeed + PID_value;
  int rightMotorSpeed = baseSpeed - PID_value;

  // Constrain speeds to 0-255
  driveMotors(leftMotorSpeed, rightMotorSpeed);
}
4. Tips for Presentation & Viva#
Building the project is only 50% of the work. Presenting it to your external examiners correctly is crucial:
- Know every component: Examiners will point to a random IC (like the L298N or ACS712) and ask what it does. Know your hardware.
- Understand the code: Don't just copy-paste. Be ready to explain the logic flow, specifically loops, interrupts, and communication protocols (I2C vs SPI).
- Highlight the application: Always start your presentation by explaining why this project is useful to society or industry.
- Fail gracefully: If your hardware fails during the demo, don't panic. Explain the theoretical working, show a pre-recorded video of it working, and explain what you think went wrong (e.g., loose wire, voltage drop). Engineers debug; they don't give up.
5. Documentation Checklist#
Ensure your final report includes the following chapters to meet standard Indian university guidelines:
- ✅ Abstract: A 200-word summary of the problem and your solution.
- ✅ Literature Review: Mention 3-4 IEEE papers related to your topic.
- ✅ Block Diagram: High-level system architecture.
- ✅ Circuit Diagram / Schematic: Created clearly using Fritzing or EasyEDA.
- ✅ Bill of Materials (BOM): List of components and costs.
- ✅ Source Code: With proper comments explaining the functions.
- ✅ Results & Conclusion: Photos of the working model and graphs (if applicable).
6. Frequently Asked Questions (FAQ)#
Which is better for a final year project: Arduino UNO or ESP32?
If your project requires Wi-Fi, Bluetooth, or cloud connectivity (IoT projects), the ESP32 is superior. If your project is purely hardware-based (like robotics or simple automation), the ADIY UNO R3 is easier to program, has wider library support, and is perfectly sufficient.
Can I use modules, or do I need to design my own PCB?
For a B.Tech final year project, assembling pre-built modules on a breadboard or perfboard is generally acceptable for the prototype phase. However, designing a custom printed circuit board (PCB) to integrate all components will significantly boost your marks and impress the examiners.
How can I make a standard project unique?
Combine technologies. Instead of a simple line follower, add an RFID reader so the robot acts as an automated warehouse vehicle that reads tags at different stations. Adding IoT dashboards to any standard sensor project immediately modernizes it.
Where can I buy reliable components for my project in India?
You can purchase reliable, "Make in India" tested components directly from ADIY. We provide fast shipping across India and quality assurance on all boards and sensors.
What language is used to program Arduino and ESP32?
Both microcontrollers are typically programmed using C/C++ within the Arduino IDE. The ESP32 can also be programmed using MicroPython.
Products & resources
Arduino Compatible
Uno R3 – Compatible CP2102
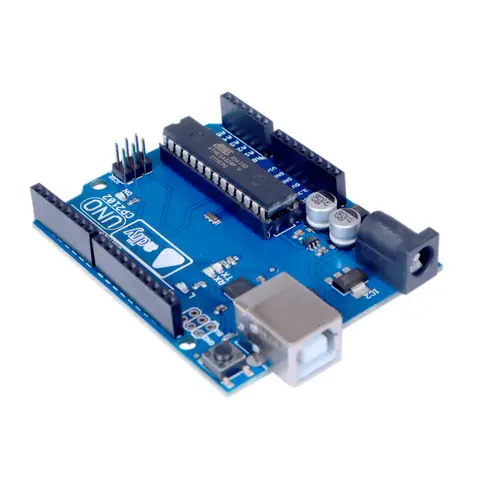
The ADIY Uno R3 CP2102 ATmega328P Development Board is a cost-effective alternative to the popular Arduino Uno R3. It is designed for beginners and professionals alike, offering robust performance and reliability. Key…
₹552
Datasheet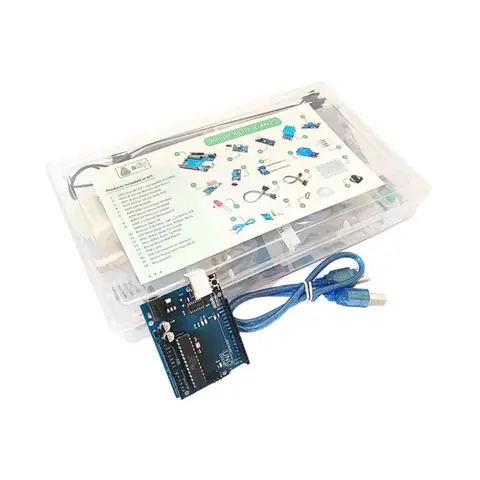
Arduino Compatible
UNO R3 Beginner kit – ADIY
ADIY Uno R3 Beginners Kit is a Stepping Stone for beginners who want to learn about electronic sensors and are excited to make projects. Beginners can learn the basics of UNO programming. Great for Starting with Arduino…
₹1,469
Datasheet
Share