Development Boardsbeginneradiy labs
Getting Started with ADIY UNO R3: Complete Beginner's Guide for Engineers (2026)
Get started with the ADIY UNO R3: pin-by-pin guide, Arduino IDE setup, Blink, buzzer, analog sensor and servo projects, plus troubleshooting.
By ADIY9 min read
Technical review pending. Figures marked “verify” or “check your part” have not been confirmed against your exact hardware revision. Check the manufacturer datasheet before relying on them in a design.
1. Introduction — What is the ADIY UNO R3?#
Welcome to the ultimate ADIY UNO R3 tutorial! Whether you're a student building your first engineering project or a seasoned professional prototyping a new IoT solution, understanding the foundational microcontroller board is key.
The ADIY UNO R3 is a high-quality, microcontroller board based on the ATmega328P. Designed and manufactured entirely under the 'Make in India' initiative in Mumbai, this board is 100% compatible with the standard Arduino UNO architecture. It serves as the perfect launchpad into the world of embedded systems, robotics, and automation.
This Arduino UNO beginner guide India edition is tailored to walk you through everything from understanding the hardware pins to writing your first lines of code. By the end of this tutorial, you'll have hands-on experience controlling hardware and reading sensor data.
2. Unboxing & What's in the Box#
When you purchase an ADIY UNO R3, you're getting a complete prototyping core. Inside the anti-static packaging, you will typically find:
- 1x ADIY UNO R3 Board: The star of the show, featuring a clean green solder mask and clearly labeled silkscreen.
- 1x USB Cable (Type A to Type B): For connecting the board to your computer to provide power and upload code.
- Header Pins (Optional add-on): Depending on the bundle, you might receive additional male/female headers.
The board feels sturdy in hand. The power jack, USB port, and female headers are soldered meticulously, a testament to ADIY's quality control standards.
3. Pin-by-Pin Description#
To use the ADIY UNO R3 effectively, you need to know how to connect it to the outside world. The board features a variety of pins designed for power, digital input/output (I/O), and analog reading.
| Pin Name / Group | Type | Description |
|---|---|---|
| D0 to D13 | Digital I/O | 14 digital pins used for simple high (5V) or low (0V) signals. D0 (RX) and D1 (TX) are used for serial communication. Avoid using D0/D1 for general IO if you are using Serial monitor. |
| D3, D5, D6, D9, D10, D11 | PWM (Digital) | Marked with a tilde (~). These pins can simulate analog output using Pulse Width Modulation (e.g., fading an LED, controlling motor speed). |
| A0 to A5 | Analog Input | 6 analog pins used to read continuous voltage levels between 0V and 5V. Perfect for potentiometers, LDRs, and temperature sensors. |
| 5V & 3.3V | Power Output | Provides regulated 5V and 3.3V to power your sensors and modules. |
| GND | Ground | Ground reference pins. Always connect the ground of your sensors to the ground of the ADIY UNO R3 to complete the circuit. |
| VIN | Power Input | Input voltage pin. You can supply 7V-12V here directly instead of using the barrel jack. |
| AREF | Analog Reference | Provides a reference voltage for the analog inputs. Rarely used by beginners. |
4. Setting Up Arduino IDE#
Because the ADIY UNO R3 is fully Arduino-compatible, we will use the official Arduino Integrated Development Environment (IDE) to write and upload code.
- Download Arduino IDE: Visit the official Arduino website and download the latest Arduino IDE (v2.x) for your operating system.
- Install the Software: Run the installer and follow the on-screen instructions.
- Connect the Board: Plug the USB Type B end into the ADIY UNO R3 and the Type A end into your PC. The green "ON" LED on the board should light up.
- Select the Board: Open Arduino IDE. Go to Tools > Board > Arduino AVR Boards and select Arduino Uno.
- Select the Port: Go to Tools > Port and select the COM port that corresponds to your board (e.g., COM3, COM4).
5. Your First Sketch: Blink LED#
The "Hello World" of electronics is making an LED blink. The ADIY UNO R3 has a built-in LED connected to Digital Pin 13, but let's wire up an external LED for practice.
Wiring Guide#
| Component | ADIY UNO R3 Pin |
|---|---|
| LED Anode (Longer leg) | Pin 13 (through a 220Ω resistor) |
| LED Cathode (Shorter leg) | GND |
The Code#
// Define the pin where the LED is connected
const int ledPin = 13;
void setup() {
  // Initialize the digital pin as an output
  pinMode(ledPin, OUTPUT);
}
void loop() {
  digitalWrite(ledPin, HIGH);  // Turn the LED on
  delay(1000);                 // Wait for a second
  digitalWrite(ledPin, LOW);   // Turn the LED off
  delay(1000);                 // Wait for a second
}
Click the Upload button (the right arrow icon) in the Arduino IDE. After a few seconds, you should see "Done uploading," and your LED will start blinking!
6. Project 1: Buzzer Alert System#
Now let's create something audible. We'll connect an active buzzer and program it to beep continuously.
Wiring Guide#
| Buzzer Pin | ADIY UNO R3 Pin |
|---|---|
| Positive (+) Pin | Pin 8 |
| Negative (-) Pin | GND |
The Code#
const int buzzerPin = 8;
void setup() {
  pinMode(buzzerPin, OUTPUT);
}
void loop() {
  digitalWrite(buzzerPin, HIGH); // Turn buzzer ON
  delay(500);                    // Half a second
  digitalWrite(buzzerPin, LOW);  // Turn buzzer OFF
  delay(500);
}
7. Project 2: Reading an Analog Sensor (Potentiometer)#
Digital pins only read HIGH or LOW. But what if you want to read varying data, like the position of a knob or the intensity of light? That's where Analog pins (A0-A5) come in.
We will connect a 10k potentiometer (a variable resistor) and read its value using the Serial Monitor.
Wiring Guide#
| Potentiometer Pin | ADIY UNO R3 Pin |
|---|---|
| Left Pin (VCC) | 5V |
| Middle Pin (Wiper) | A0 |
| Right Pin (GND) | GND |
The Code#
const int potPin = A0;
int sensorValue = 0;
void setup() {
  // Start serial communication at 9600 baud rate
  Serial.begin(9600);
}
void loop() {
  // Read the analog value (returns 0 to 1023)
  sensorValue = analogRead(potPin);

  // Print value to the Serial Monitor
  Serial.print("Potentiometer Value: ");
  Serial.println(sensorValue);

  delay(200); // Small delay for readability
}
Upload the code, then click the magnifying glass icon in the top right of the IDE to open the Serial Monitor. Turn the potentiometer knob to see the values change between 0 and 1023.
8. Project 3: Controlling a Servo Motor#
Servos are essential for robotics. They allow precise control of angular position. We will use the built-in Servo.h library to sweep a micro servo motor back and forth.
Wiring Guide#
| Servo Wire Color | ADIY UNO R3 Pin |
|---|---|
| Red (Power) | 5V |
| Brown/Black (Ground) | GND |
| Orange/Yellow (Signal) | Pin 9 (PWM pin) |
The Code#
#include <Servo.h>
Servo myServo;  // Create servo object
int pos = 0;    // Variable to store servo position
void setup() {
  myServo.attach(9);  // Attach servo signal to pin 9
}
void loop() {
  // Sweep from 0 to 180 degrees
  for (pos = 0; pos <= 180; pos += 1) {
    myServo.write(pos);
    delay(15);
  }
  // Sweep from 180 back to 0 degrees
  for (pos = 180; pos >= 0; pos -= 1) {
    myServo.write(pos);
    delay(15);
  }
}
9. Troubleshooting Common Issues#
Even the best engineers run into bugs. Here are the top 5 common problems beginners face with the ADIY UNO R3 and how to solve them.
- Error: "avrdude: stk500_getsync() attempt 1 of 10: not in sync"
Solution: This means the computer isn't communicating with the board. Check your USB cable (make sure it's not a charge-only cable). Ensure you selected the correct COM Port and that 'Arduino Uno' is selected as the board. - Code Uploads, but Nothing Happens
Solution: Double-check your wiring. If you're lighting an LED, check the polarity (long leg to pin, short leg to GND). Ensure your breadboard connections are tight. - Serial Monitor Showing Gibberish
Solution: The baud rate in your code (e.g.,Serial.begin(9600);) must match the baud rate selected in the bottom right corner of the Serial Monitor window. - Board Keeps Resetting or Disconnecting
Solution: You might be drawing too much current. If you're powering multiple servos or motors directly from the 5V pin, it will overload the regulator. Use an external power supply for heavy loads. - Port Option is Grayed Out
Solution: Unplug and replug the USB cable. If it's still grayed out, install the CH340 driver for Windows, or check your Mac system privacy settings.
10. FAQ Section#
Is ADIY UNO R3 completely compatible with Arduino IDE?
Yes! The ADIY UNO R3 works exactly like a standard Arduino UNO R3. You can use the official Arduino IDE, select 'Arduino UNO' as the board, and upload your sketches without any extra configuration.
Do I need to install special drivers for the ADIY UNO R3?
The ADIY UNO R3 typically uses standard USB-to-Serial converter chips. If you are using Windows and the port doesn't show up automatically, installing the CH340 driver will solve the issue quickly.
What is the maximum voltage I can supply to the ADIY UNO R3?
The recommended input voltage via the DC barrel jack is 7V to 12V. Going below 7V might cause instability, and going above 12V can overheat the onboard voltage regulator.
Can I use shields designed for the Arduino UNO on the ADIY UNO R3?
Absolutely. The pin headers on the ADIY UNO R3 follow the standard Arduino UNO R3 footprint, ensuring 100% compatibility with motor shields, relay shields, and LCD shields.
Why is 'Make in India' important for ADIY boards?
As a 'Make in India' brand, ADIY ensures local manufacturing, robust quality control, and faster domestic shipping, keeping prices affordable (in ₹) while delivering reliable components for Indian students and engineers.
Products & resources
Arduino Compatible
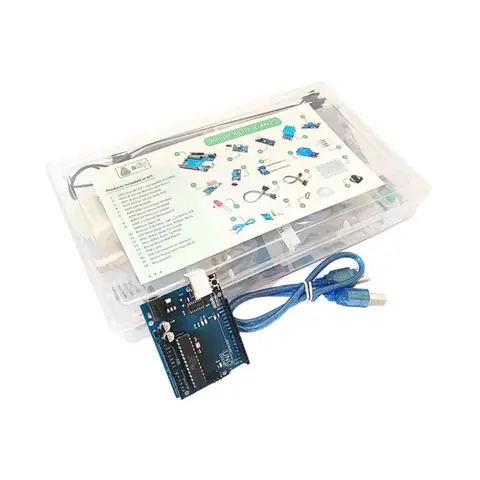
UNO R3 Beginner kit – ADIY
ADIY Uno R3 Beginners Kit is a Stepping Stone for beginners who want to learn about electronic sensors and are excited to make projects. Beginners can learn the basics of UNO programming. Great for Starting with Arduino…
₹1,469
Datasheet
Share